📑Table of Contents:
- What Is a Drainage Pit?
- When Do You Need a Drainage Pit?
- Choosing the Right Location
- Check the Soil Before Installation
- Determine the Required Pit Size
- How to Install a Drainage Pit
- Connecting Drainage Pipes
- Using Gravel and Geotextile Fabric
- Installing a Sump Pump in a Drainage Pit
- Backfilling and Finishing the Installation
- Common Drainage Pit Installation Mistakes
- How to Maintain a Drainage Pit
- Do You Need a Professional Installer?
- Final Thoughts
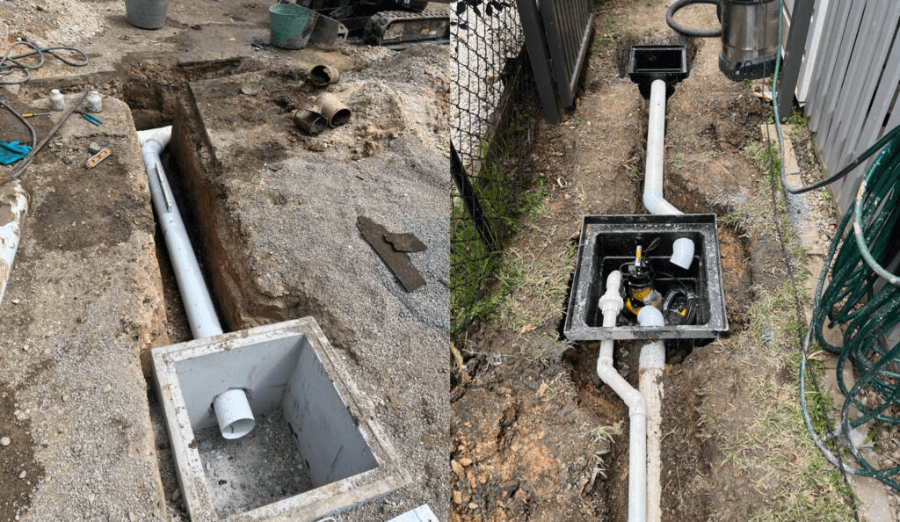
Excess water around a property can cause far more than muddy patches. Poor drainage may contribute to standing water, soil erosion, damaged landscaping, foundation moisture, and flooded low areas. As a result, many homeowners and property managers use drainage pits to collect or temporarily store runoff and help water move away from problem areas.
A drainage pit can serve several purposes depending on its design. Some pits collect surface water and direct it into underground pipes, while others let water soak gradually into the surrounding soil. In other installations, the pit houses a sump pump that actively moves water to a safer discharge point.
However, successful drainage pit installation requires more than digging a hole and filling it with gravel. Location, soil conditions, capacity, pipe slope, groundwater level, and local drainage rules all affect performance.
Understanding these factors before installation can help prevent expensive drainage problems later.
What Is a Drainage Pit?
A drainage pit is an underground structure designed to collect, manage, or redirect excess water.
Depending on the application, contractors may also use terms such as catch pit, soak pit, dry well, drainage sump, or collection pit. Although these systems share similarities, they do not always perform the same function.
For example, a catch pit collects runoff and allows sediment to settle before water enters a drainage pipe. Meanwhile, a soak pit stores water temporarily and allows it to infiltrate into the soil.
A sump pit works differently because it usually contains a pump. When water reaches a certain level, the pump activates and moves it through a discharge pipe.
Therefore, the first step in any drainage pit installation involves deciding exactly what problem the pit needs to solve.
When Do You Need a Drainage Pit?
A drainage pit may help when water consistently collects in one section of a property.
For example, low areas in a yard can trap rainwater after storms. Likewise, driveway runoff may flow toward a garage or building instead of away from it.
Common drainage pit applications include:
- Collecting roof or downspout runoff
- Managing water around driveways and patios
- Reducing standing water in low sections of a yard
- Connecting several underground drainage pipes
- Supporting French drain systems
- Collecting basement or foundation drainage
- Housing a sump pump
- Temporarily storing stormwater before infiltration
However, a drainage pit cannot solve every water problem.
If groundwater regularly rises close to the surface, an infiltration pit may not work properly. Similarly, heavy clay soil can absorb water so slowly that a basic soak pit remains full for long periods.
Therefore, inspect the site carefully before choosing a drainage solution.
Choosing the Right Location
Location strongly influences drainage pit performance.
Generally, the pit should sit near where water naturally collects while staying far enough from foundations, retaining walls, septic systems, wells, and other sensitive structures.
Additionally, gravity should work in your favor whenever possible. Water entering underground pipes needs sufficient slope to reach the pit without backing up.
Before digging, identify underground utilities. Gas lines, electrical cables, water pipes, irrigation systems, and communication lines may cross the proposed excavation area.
Moreover, consider where excess water will go when the pit reaches capacity. Even a well-designed system can overflow during extreme rainfall.
Therefore, the overflow should move toward a safe area rather than toward a building or neighboring property.
Check the Soil Before Installation
Soil determines whether an infiltration-style drainage pit can work effectively.
Sandy and gravel-rich soils generally allow water to move through them relatively quickly. In contrast, compacted clay soils can drain extremely slowly.
You can perform a basic infiltration test by digging a test hole, adding water, and observing how quickly the water level drops. However, large or critical drainage projects may require a more formal soil assessment.
Additionally, check the seasonal groundwater level.
If groundwater frequently rises into the proposed pit, the system cannot absorb additional stormwater effectively. In that situation, another drainage approach may work better.
Therefore, never design a soak pit based only on how the ground looks during dry weather.
Determine the Required Pit Size
A drainage pit must have enough capacity for the amount of water entering it.
Several factors influence the required size, including:
- Roof or paved surface area
- Local rainfall intensity
- Soil infiltration rate
- Number and diameter of inlet pipes
- Available overflow route
- Depth and width of the pit
For a small residential area, a compact pit may provide enough storage. However, a large roof, driveway, commercial area, or multiple connected drains can generate much more water.
As a result, undersizing creates one of the most common drainage-system problems.
A pit that fills faster than it drains may overflow during heavy rain. Therefore, larger projects often benefit from professional drainage calculations.
How to Install a Drainage Pit
The exact installation method depends on the pit type, but most projects follow a similar process.
Mark and Excavate the Area
First, mark the planned dimensions and confirm that no underground services cross the area.
Next, excavate the hole to the required depth and width. The excavation should provide enough space for the drainage chamber, surrounding gravel, and connecting pipes.
Additionally, keep the base reasonably level so the chamber sits securely.
For deeper excavations, take soil stability seriously. Unsupported trench or pit walls can collapse unexpectedly.
Prepare the Base
Next, prepare a stable drainage layer.
Install clean crushed stone or drainage gravel at the bottom of the excavation. Then compact or level the base according to the chamber manufacturer’s requirements.
This layer provides support and helps water move around the structure.
However, avoid soil with excessive fine particles because sediment can gradually block drainage spaces.
Install the Drainage Chamber
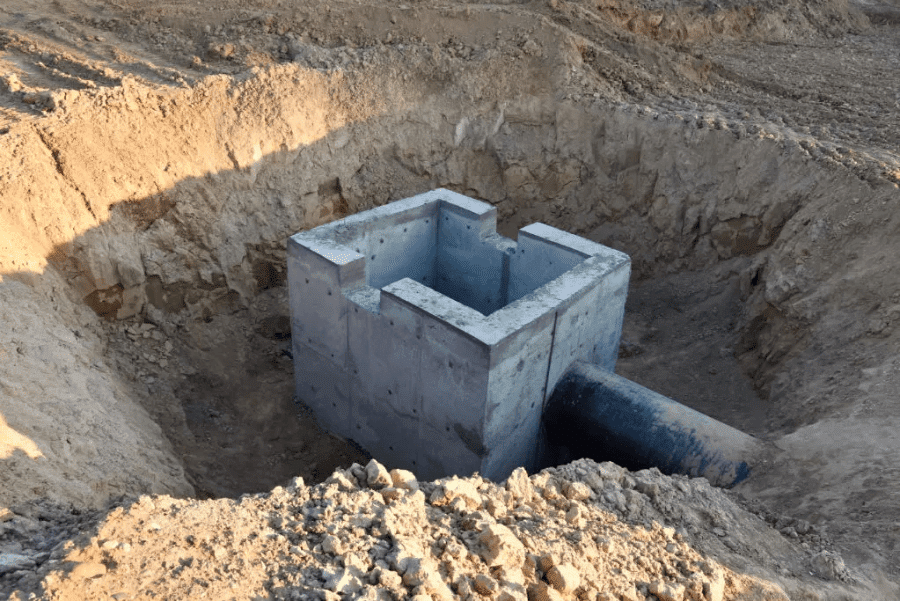
Place the drainage pit, dry-well chamber, catch basin, or other structure into the excavation.
Prefabricated plastic chambers have become popular because they are lightweight and easy to connect to drainage pipes. However, concrete drainage pits offer greater weight and strength for certain applications.
Make sure the chamber remains level.
Additionally, position inlet and outlet openings correctly before connecting pipes.
Connecting Drainage Pipes
Pipes should direct water efficiently into the pit.
For example, a downspout may connect to a solid underground pipe that runs toward the drainage chamber. Likewise, French drains may feed perforated or solid piping into the pit.
Maintain a consistent downward slope toward the collection point.
If the pipe rises or develops low sections, water and sediment can remain trapped. As a result, the system may drain slowly or clog.
Additionally, seal connections where required and protect pipe joints from soil movement.
For pits that include an outlet, position the outlet according to the intended water level inside the chamber.
Using Gravel and Geotextile Fabric
Gravel plays an important role in many infiltration pits.
Once the chamber sits correctly, clean drainage stone can fill the surrounding space. The voids between stones create additional temporary water-storage capacity.
Geotextile fabric may also separate the drainage material from surrounding soil.
Without separation, fine soil particles can gradually migrate into the gravel and reduce its ability to transmit water. Therefore, properly installed geotextile can help preserve drainage performance.
However, the exact fabric arrangement depends on the drainage system. Follow the chamber or system design rather than wrapping every component automatically.
Installing a Sump Pump in a Drainage Pit
Some sites cannot rely on gravity or natural infiltration.
In that situation, a sump pump can move collected water to another location.
Install the pump near the bottom of the sump pit and connect it to an appropriate discharge line. Additionally, position the float switch so the pump starts before the pit reaches overflow level.
A check valve usually prevents discharged water from flowing backward when the pump stops.
Moreover, think about power failure. Heavy storms often cause electrical outages at exactly the time a drainage pump needs to operate.
Therefore, critical systems may benefit from a battery backup, secondary pump, alarm, or another emergency arrangement.
Backfilling and Finishing the Installation
Once all connections are complete, test the system before covering it.
Run water through the inlet pipes and confirm that it reaches the pit correctly. Additionally, check for leaking connections, poor slopes, or unexpected backups.
Then, complete the gravel backfill and replace soil around the installation where appropriate.
Compact the surface carefully without damaging the chamber or pipes.
Finally, shape the surrounding ground so surface water continues moving toward the intended drainage points rather than creating new low areas.
Common Drainage Pit Installation Mistakes
Several mistakes can reduce performance dramatically.
One of the most common is installing a pit without checking soil drainage. Additionally, homeowners sometimes choose a pit that is far too small for the amount of runoff entering it.
Poor pipe slope creates another frequent issue.
Other problems include placing the pit too close to a building, allowing soil to contaminate drainage gravel, failing to provide overflow protection, and installing a sump pump without considering power failure.
Moreover, directing water onto neighboring property can create both practical and legal problems.
Therefore, drainage planning should consider the water’s entire path, not just the pit itself.
How to Maintain a Drainage Pit
Even a properly installed system needs maintenance.
Inspect the pit periodically, especially after heavy storms. Remove leaves, dirt, and sediment from catch basins before these materials enter underground pipes.
Additionally, check that inlet and outlet pipes remain open.
If the system includes a sump pump, test it regularly by adding enough water to activate the float switch. Also inspect the discharge line for blockages or freezing risks.
Over time, infiltration pits may accumulate sediment that reduces drainage capacity. Slower drainage or repeated overflow can indicate the system needs cleaning or repair.
Do You Need a Professional Installer?
Experienced DIY homeowners may handle small surface-water projects. However, deeper pits, major roof drainage systems, foundation drainage, and installations near buildings require more careful engineering.
Local rules may also control where stormwater can discharge and how infiltration systems must sit relative to property lines, wells, septic systems, and structures.
Therefore, consult a drainage contractor, civil engineer, or local authority when the project involves significant water volume or structural risk.
Professional planning may cost more upfront, but it can prevent foundation damage, flooding, and repeated excavation later.

Final Thoughts
Drainage pit installation can effectively manage stormwater, reduce standing water, and protect buildings and landscaping from excess moisture.
However, a successful system begins with proper planning. You need to understand where the water comes from, how much water the site receives, how quickly the soil drains, and where overflow can safely travel.
From there, correct excavation, a stable gravel base, suitable pipe slopes, proper filtration materials, and adequate capacity help create a reliable system.
Ultimately, the goal is not simply to hide water underground. Instead, a well-designed drainage pit manages water in a controlled way and keeps it away from areas where it can cause damage.