📑Table of Contents:
- What Is a Drainage Pit?
- Where Should You Install a Drainage Pit?
- Check Underground Services Before Digging
- Choose the Correct Drainage Pit
- Plan the Inlet and Outlet Levels
- Excavate the Pit Area
- Prepare a Stable Bedding Base
- Position and Level the Drainage Pit
- Connect the Drainage Pipes
- Check Pipe Fall Before Backfilling
- Backfill Around the Pit
- Install the Grate and Finish the Surface
- How Do You Test a Drainage Pit?
- How Do You Maintain a Drainage Pit?
- Install Drainage Pit: Final Take
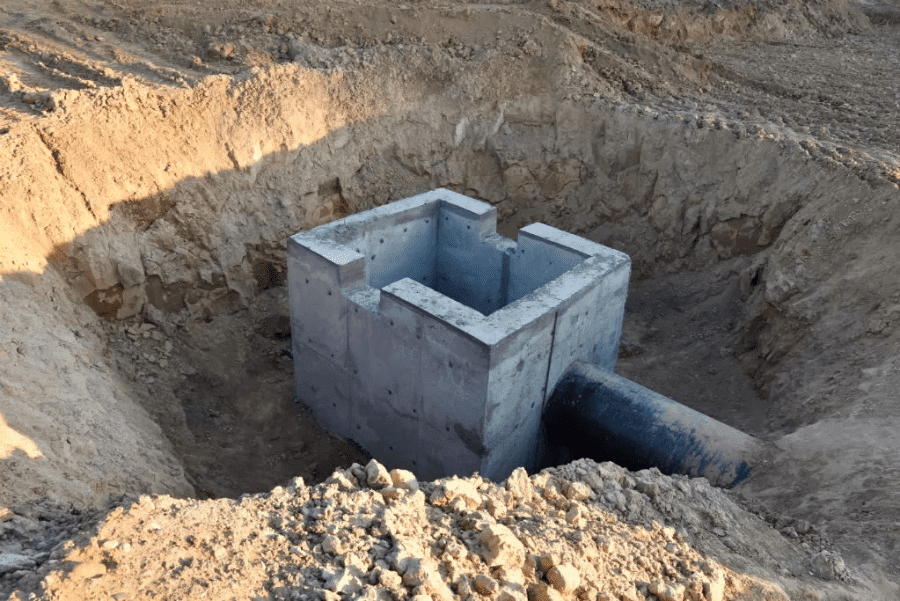
Installing a drainage pit can help collect surface water and direct it safely into a stormwater drainage system. You commonly find drainage pits in yards, driveways, courtyards, paved areas, garden zones, and low points where rainwater naturally gathers.
However, simply placing a plastic or concrete pit in the ground will not solve drainage problems.
The pit needs the correct location, depth, pipe connections, base support, grate, and outlet fall. Moreover, the surrounding ground must direct water toward the inlet rather than away from it.
Therefore, good drainage pit installation starts with planning rather than excavation.
What Is a Drainage Pit?
A drainage pit is an underground chamber that collects stormwater before directing it into drainage pipes.
Most residential pits use a grated opening at ground level. Rainwater enters through the grate, and connected pipes carry it to a legal discharge point, another pit, a detention system, or an approved stormwater connection.
Additionally, a pit can provide access to pipe junctions for future inspection and maintenance.
Common materials include polypropylene, polyethylene, and precast concrete.
Plastic pits are well-suited to many residential landscaping applications because they are lightweight and easy to modify. Meanwhile, concrete pits generally handle larger systems and heavier loads.
Where Should You Install a Drainage Pit?
Place the pit where water naturally collects or where the drainage design requires one.
Typical locations include:
- Low points in paved areas
- Driveways
- Courtyards
- Patio edges
- Downpipe junctions
- Garden drainage systems
- Pathways
- Connections between several stormwater pipes
However, avoid choosing a location based on appearance alone.
First, observe how water moves during heavy rain. Additionally, check finished surface levels and determine where the outlet pipe can run with sufficient fall.
The pit grate should be set at a level that allows surrounding surfaces to drain toward it.
Therefore, the lowest practical collection point often provides the best location.
Check Underground Services Before Digging
Never start excavation until you know what lies underground.
Electrical cables, gas pipes, communications lines, water services, sewer pipes, and existing stormwater drains may cross the proposed excavation area.
In Australia, Before You Dig Australia provides plans for many underground services.
However, service plans do not replace careful site investigation.
Therefore, confirm the location and depth of existing infrastructure before using excavation equipment.
Moreover, deep excavations can create collapse hazards.
If the pit requires substantial excavation or the soil appears unstable, use appropriate trench-safety procedures and professional assistance.
Choose the Correct Drainage Pit
Pit size depends on water volume, pipe diameter, depth, location, and system design.
A small landscape pit may suit a garden or patio. However, a driveway that collects runoff from a large paved area may require a larger, stronger unit.
Additionally, consider how many pipes need to enter the chamber.
A larger pit provides more room for several inlet pipes, an outlet, and future access for cleaning.
The grate also matters.
A pedestrian area can use a grate designed for foot traffic. However, pits installed in driveways or vehicle areas need covers and frames rated for the expected wheel loads.
Therefore, never place a lightweight landscape grate where cars will regularly drive.
Plan the Inlet and Outlet Levels
Correct pipe levels determine whether the system drains properly.
The outlet pipe normally sits lower than the inlet pipes so gravity can move water through the pit.
Therefore, establish your invert levels before digging.
An invert level refers to the inside bottom level of a drainage pipe.
Next, determine the required pipe fall toward the discharge point.
Avoid creating the slope after installing the pit, as you may find the outlet sits too high or too low.
Instead, use a laser level, builder’s level, or string line to mark the required levels first.
Moreover, verify that the final discharge point can legally and physically accept the water.
Excavate the Pit Area
Once you confirm the location and levels, mark an excavation wider than the pit itself.
The extra space gives you room to position the pit, connect pipes, and place backfill evenly.
Dig to a depth that includes both the pit and its bedding layer.
However, do not disturb more soil than necessary.
A stable excavation makes installation easier and reduces settlement later.
Additionally, remove loose, organic, or unsuitable material from the bottom.
If groundwater enters the excavation, control it before installing the pit.
The base must remain stable enough to support the pit without sinking or tilting.
Prepare a Stable Bedding Base
Never place the pit directly on loose or uneven soil.
Instead, prepare a level bedding layer using material suitable for the pit type and project specification.
Compact the bedding to provide even support across the base.
For many drainage installations, sand or approved granular bedding works well. However, manufacturers or engineering drawings may specify another material.
Therefore, follow the pit manufacturer’s installation instructions when available.
Next, place the pit on the bedding and check the height.
The top must finish at the planned surface level once the grate and surrounding paving, soil, or concrete are complete.
Position and Level the Drainage Pit
Place the pit carefully and check it in both directions with a spirit level.
Although the surrounding pavement may slope toward the grate, the pit itself should sit securely without rocking.
Moreover, confirm the outlet orientation before you begin cutting pipe penetrations.
Rotating a plastic pit later can become difficult once several pipes enter it.
Therefore, dry-fit the pit and pipe layout before making permanent connections.
Check the grate height again as well.
If the grate sits too high, water may flow around the pit rather than into it. Conversely, a grate installed excessively low can create a trip hazard or unwanted depression.
Connect the Drainage Pipes
Mark each pipe position on the pit wall.
Then create appropriately sized openings using the manufacturer’s recommended method.
For plastic pits, installers commonly use hole saws or designated knockout areas.
However, avoid oversized or roughly broken holes because they make sealing difficult.
Insert the pipe and support it independently so its weight does not pull on the pit wall.
Moreover, use compatible connectors, seals, grommets, or approved sealants around penetrations.
Everhard notes that unsupported pipes can move and compromise connections, so some installations need mechanical reinforcement around the penetration.
Therefore, a secure connection matters as much as a watertight one.
Check Pipe Fall Before Backfilling
Before covering anything, confirm that every pipe runs in the correct direction.
Use a level, laser, or other suitable measuring method.
Additionally, pour water through the upstream drainage points and check that it flows freely into and out of the pit.
Look for leaks around each penetration.
If water sits inside an inlet pipe or runs backward, correct the levels now.
Once you complete the backfill, adjustments become considerably harder.
Therefore, testing before burial can save significant rework.
Backfill Around the Pit
Backfill evenly around all sides rather than filling one side completely first.
Uneven backfill can push a lightweight pit out of alignment.
Place suitable material in manageable layers and compact it carefully.
Moreover, avoid aggressive compaction directly against plastic pit walls unless the manufacturer permits it.
Holcim’s pit guidance recommends uniformly placing and compacting backfill so pit components and joints do not move and future settlement remains minimal.
Continue checking the grate level while backfilling.
Therefore, you can correct small movements before the pit becomes fully surrounded.
Install the Grate and Finish the Surface
Install the correct grate, lid, or frame after stabilizing the pit.
In landscaped areas, shape the surrounding soil so water naturally flows toward the grate.
For paving, create a subtle fall toward the inlet.
Meanwhile, concrete driveway installations may require a suitable surround or structural detail around the pit and frame.
The grate should finish flush with the intended surface unless the drainage design specifies otherwise.
Moreover, make sure the cover remains removable for future cleaning.
Do not permanently bury access points.
How Do You Test a Drainage Pit?
Testing should simulate actual stormwater flow.
Run water from several upstream points and watch the pit.
Check that:
- Water reaches the pit easily
- Inlet pipes drain freely
- The outlet carries water away
- Connections do not leak
- The pit stays level
- No surrounding soil collapses
- The grate remains stable
- Water does not pond around the inlet
Additionally, inspect the downstream discharge point.
A perfectly installed pit cannot solve a blocked or undersized downstream drainage system.
Therefore, investigate the entire flow path if water still backs up.
How Do You Maintain a Drainage Pit?
Drainage pits collect more than water.
Leaves, soil, mulch, gravel, litter, and sediment can eventually accumulate inside.
Therefore, inspect the pit periodically and especially before seasons with heavy rainfall.
Lift the grate and remove debris from the bottom.
Additionally, check that the outlet remains open.
Repeated blockages may indicate that the surrounding landscaping is sending too much loose material into the pit.
In that case, improving surface finishes or implementing erosion control may reduce maintenance needs.

Install Drainage Pit: Final Take
To install a drainage pit correctly, start by choosing the right location and establishing accurate pipe and surface levels.
Next, excavate safely, create a stable, compacted base, position the pit, and securely connect each inlet and outlet.
Moreover, test the pipe fall and connections before backfilling.
Then compact suitable backfill evenly, install the correct grate, and shape the surrounding surface so stormwater naturally reaches the pit.
For Australian projects, current design and installation requirements may involve AS/NZS 3500.3:2025 together with state, council, and manufacturer requirements.
Ultimately, a drainage pit works only as well as the system around it. Correct levels, stable bedding, secure pipe connections, adequate downstream capacity, and regular maintenance matter far more than simply placing a pit at the lowest point of the yard.