📑Table of Contents:
- What Is a Drain Pit?
- Why Is Proper Drain Pit Installation Important?
- How to Choose the Right Location for a Drain Pit
- Materials and Tools Required for Drain Pit Installation
- Step-by-Step Drain Pit Installation Process
- Step 1: Plan the drainage system
- Step 2: Mark the installation area
- Step 3: Excavate the pit safely
- Step 4: Prepare the base and pit structure
- Step 5: Install the inlet pipe
- Step 6: Install the pit and surrounding materials
- Step 7: Provide an appropriate cover and access
- Step 8: Backfill and restore the area
- Step 9: Test the completed system
- Common Drain Pit Installation Mistakes to Avoid
- Drain Pit Maintenance and Troubleshooting
- Drain Pit Installation Cost Factors
- FAQs
- Conclusion
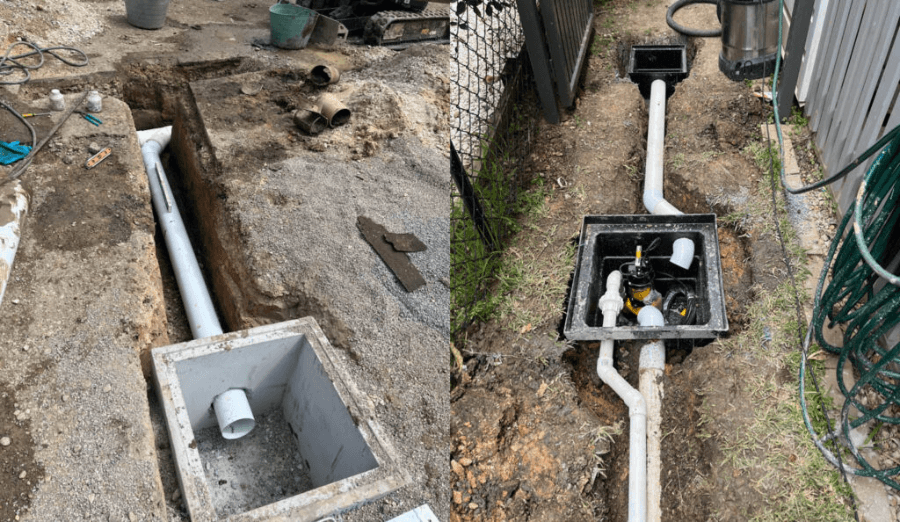
Drain pit installation plays an important role in managing wastewater and rainwater around residential and commercial properties. A properly designed drain pit helps control excess water, reduces localized flooding, and supports a reliable drainage system. However, successful installation requires more than digging a hole and filling it with stones or connecting a pipe.
The right installation method depends on the drain pit type, the surrounding soil, the groundwater level, and the amount of water the system must handle. For example, a rainwater soakaway pit works differently from a wastewater inspection chamber or a soak pit connected to a septic tank. Therefore, understanding these differences is essential before starting any construction work.
In this guide, you’ll learn how drain pits work, how to choose the right location, what materials you need, and how to install them safely. We’ll also cover common mistakes, maintenance requirements, and key considerations for long-term performance.
What Is a Drain Pit?
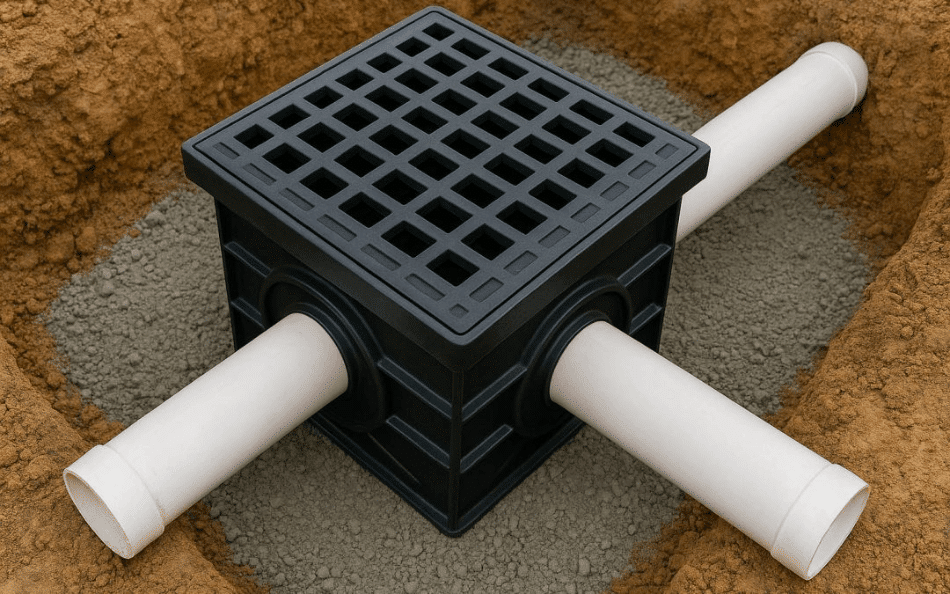
A drain pit is an underground structure that collects, directs, temporarily stores, or helps dispose of water. Its design depends on the drainage problem it needs to solve.
For instance, a property may use a drain pit to manage rainwater from a roof, collect wastewater for transfer to another drainage structure, or provide access for inspecting underground pipes.
Although people often use the terms drain pit, soak pit, and soakaway pit interchangeably, they do not always describe the same structure.
Types of drain pits
Several types serve different purposes.
- Rainwater soakaway pit: Collects rainwater and allows it to infiltrate suitable surrounding soil.
- Wastewater soak pit: Receives properly treated wastewater, usually from an approved treatment or septic system, where local regulations and site conditions permit.
- Inspection chamber: Provides access to underground drainage pipes for inspection, cleaning, and blockage removal.
- Sump pit: Collects water at a low point so a pump can remove it when gravity drainage cannot work effectively.
Choosing the correct type is the first step toward a successful installation. Never assume a pit designed for rainwater can safely handle sewage or other contaminated water.
Why Is Proper Drain Pit Installation Important?
A well-designed drain pit helps protect a property from water-related problems. Nevertheless, poor installation can create new problems instead of solving existing ones.
Preventing waterlogging and flooding
Rainwater can accumulate around buildings when roofs, paved areas, and surrounding ground cannot drain efficiently. As a result, standing water may damage landscaping, weaken some soils, and make outdoor spaces difficult to use.
A properly sized rainwater drain pit can help manage runoff by providing temporary storage and, where suitable, allowing water to infiltrate the ground.
Protecting foundations
Water that repeatedly collects beside a building may contribute to dampness, erosion, or unwanted pressure against below-ground structures. Therefore, installers must position and design drainage systems carefully to prevent water from moving toward foundations.
A soakaway should not sit too close to a building or discharge water where it could undermine the foundation. The required clearance depends on local regulations, soil conditions, and the structure’s design.
Improving drainage efficiency
A well-designed pit can reduce the burden on other drainage components. For example, a rainwater system may direct runoff from downpipes into a soakaway rather than allowing it to collect in a yard.
However, the pit must have enough capacity and the surrounding soil must accept water at a suitable rate. Otherwise, the system may overflow during heavy rainfall.
How to Choose the Right Location for a Drain Pit
Location directly affects a drain pit’s safety and performance. Therefore, assess the site before excavation begins.
Check the soil drainage capacity.
Different soils absorb water at different rates. Sandy and gravelly soils often allow water to infiltrate relatively quickly, while dense clay may drain very slowly.
Before installing a soakaway, arrange an appropriate soil infiltration or percolation test. This assessment helps determine whether the ground can accept the expected water flow and supports the sizing calculations.
If the soil drains poorly, a conventional soakaway may not work. Instead, you may need a professionally designed alternative drainage arrangement.
Assess the groundwater level.
The seasonal groundwater level matters just as much as the soil type. If groundwater rises into the proposed pit, the available storage and infiltration capacity may become inadequate.
A poorly located pit can also introduce contaminants into groundwater. This risk becomes especially serious when a system handles wastewater.
Maintain safe distances
Keep the pit away from foundations, underground utilities, water supplies, property boundaries, and other drainage structures as required by local rules.
For example, UK guidance commonly uses a minimum separation of 5 meters between a surface-water soakaway and a building or road, along with additional boundary and groundwater restrictions. However, these figures are not universal rules for every country or pit type.
Before digging, check the applicable building code and obtain professional advice where necessary. Also, arrange to have underground electrical cables, water pipes, gas lines, and other services identified.
Consider access and future maintenance.
Choose a location that allows workers to inspect and maintain the system without disturbing the building or major landscaping.
Additionally, consider where overflow water will go during exceptionally heavy rainfall. A safe overflow route can reduce the risk of water entering the building or damaging neighboring property.
Materials and Tools Required for Drain Pit Installation
The exact materials depend on the pit’s purpose, dimensions, and construction method. Nevertheless, a typical rainwater soakaway may require the following items.
Essential materials
- Perforated concrete rings, suitable masonry, or purpose-made soakaway crates
- Clean, appropriately graded gravel or crushed stone, where the design calls for aggregate
- Suitable geotextile filter fabric
- Drainage pipes and compatible fittings
- Pipe bedding and backfill materials
- An appropriately rated access cover or inspection lid
- Approved seals and connectors where required
Not every soakaway uses every material. For instance, a modular crate system has different requirements from a rubble-filled pit. Follow the manufacturer’s specifications and the approved design rather than mixing construction methods without professional guidance.
Tools and equipment
Depending on the project, installers may need measuring equipment, excavation machinery, shovels, pipe-cutting tools, a level or laser level, and equipment for compacting suitable backfill.
Excavation safety equipment is also essential. Deep pits and unstable ground may require engineered shoring or other protective systems.
Step-by-Step Drain Pit Installation Process
The following sequence describes the general approach to installing a rainwater soakaway pit. Wastewater pits, septic systems, and inspection chambers require different designs and may need licensed professionals or formal approvals.
Step 1: Plan the drainage system
First, determine where the water comes from and how much the system must handle. Roof area, paved surfaces, rainfall intensity, and the proposed discharge route all influence the design.
Next, confirm that a soakaway is permitted and suitable for the site. Identify the groundwater level, test soil infiltration, and check the required separation distances.
At this stage, a drainage professional can calculate the required storage volume and infiltration area. Avoid choosing arbitrary dimensions based solely on the size of an available excavation machine.
Step 2: Mark the installation area
Once the design is complete, mark the pit’s position and outline the pipe route.
Check the marked area against underground services and nearby structures. In addition, confirm the intended pipe levels so rainwater can reach the pit by gravity where the design relies on gravity drainage.
Step 3: Excavate the pit safely
Excavate to the dimensions and depth specified by the design. Remove unsuitable material and prepare a stable base that matches the selected construction method.
However, never enter an unsupported excavation that could collapse. Soil can fail suddenly, especially after rain or when the excavation lies near structures or carries additional loads.
Use appropriate shoring, edge protection, safe access, and machinery exclusion zones. A competent person should determine the necessary precautions before work begins.
Step 4: Prepare the base and pit structure
Prepare the base according to the approved design. Depending on the system, the installation may use a gravel base, a purpose-made modular crate, or a suitable lined structure.
For a rubble-filled soakaway, the selected aggregate should provide adequate void space for temporary water storage. For a modular system, install the units according to the manufacturer’s instructions.
Some soakaways use geotextile fabric to keep fine soil particles from entering and clogging the drainage voids. Install the fabric in the specified arrangement, while ensuring that it suits the soil and system design.
Do not use ordinary plastic sheeting as a substitute for permeable filter fabric where the design requires water to infiltrate through the surrounding soil.
Step 5: Install the inlet pipe
Connect the incoming drainage pipe to the pit using compatible fittings and the specified pipe gradient.
The pipe should carry water into the intended part of the structure without creating an unintended leak beside the foundation. Additionally, install leaf screens, silt traps, or other pretreatment components where the design calls for them.
These components help prevent leaves, sediment, and debris from entering the soakaway. As a result, they can reduce clogging risk and extend the system’s useful life.
Step 6: Install the pit and surrounding materials
Position the selected pit structure and complete the surrounding aggregate or backfill in accordance with the design.
For a modular crate system, ensure the units connect correctly, and the filter fabric remains intact. For a lined pit, confirm that the lining provides the required stability and drainage openings.
Avoid allowing excavated clay, topsoil, or construction debris to contaminate the infiltration surface. Likewise, do not compact the drainage aggregate in a way that crushes components or removes the void space the system needs.
Step 7: Provide an appropriate cover and access
Install a suitable cover that protects people from falling into the pit and prevents debris from entering.
The cover must match the structure’s location and expected loading. For example, a cover in a pedestrian area may require a different load rating from one in a driveway.
Where inspection or maintenance access is necessary, keep the access point identifiable and reachable. Never leave an open pit unattended.
Step 8: Backfill and restore the area
Backfill around the installation using the specified material and method. Work carefully to avoid damaging pipes, displacing connections, or crushing the pit structure.
Next, restore the surrounding surface and shape the ground so that runoff flows toward the intended drainage points rather than the building.
If the design includes an overflow route, confirm that it leads to an approved and safe discharge point.
Step 9: Test the completed system
Before declaring the work complete, inspect the pipe connections, cover, structure, and surrounding ground.
Introduce an appropriate amount of clean water into the system and observe how it flows. Check for leaks, unexpected pooling, displaced components, and signs of water escaping near the foundation.
However, a simple water test does not replace a formal infiltration test or prove that the pit can handle a major storm. A qualified professional should verify that the finished installation meets the design and applicable requirements.
Common Drain Pit Installation Mistakes to Avoid
Even a well-intentioned installation can fail when workers overlook basic drainage principles.
Ignoring soil conditions
Installing a soakaway without testing the soil is a common mistake. If the ground absorbs water too slowly, the pit may remain full and overflow.
Therefore, test the site before selecting the pit size or committing to a particular design.
Making the pit too small
A pit with insufficient storage or infiltration capacity may fail during prolonged rainfall. On the other hand, simply digging a deeper pit does not guarantee better performance, especially when groundwater lies close to the surface.
Instead, size the system using rainfall, contributing area, soil test results, groundwater conditions, and applicable design guidance.
Using unsuitable fill materials
Fine sand, soil, construction waste, and poorly graded debris can reduce the available void space and obstruct water movement.
Use the materials specified for the chosen system. Additionally, protect the infiltration surface from sediment during construction.
Connecting sewage to a rainwater pit
Never discharge untreated sewage into a rainwater soakaway. Doing so can contaminate soil and groundwater and expose people to harmful pathogens.
A wastewater disposal system needs appropriate treatment, design, and regulatory approval. Even treated effluent may require a different disposal arrangement from stormwater.
Neglecting maintenance access
A system without practical access can become difficult and expensive to inspect. Therefore, include suitable inspection points, removable screens, and access covers wherever the design requires them.
Drain Pit Maintenance and Troubleshooting
Regular maintenance helps a drainage system continue working effectively. Although maintenance needs vary by system, several checks apply to many rainwater installations.
Remove leaves and sediment.t
Inspect inlet screens and accessible silt traps periodically, especially after storms or during seasons when trees shed leaves.
Clear accumulated debris before it reaches the pit. Nevertheless, avoid opening or entering the pit unless a competent person has established a safe procedure.
Watch for standing water.
If water remains in a soakaway for unusually long periods, the soil may drain poorly, or the system may have become clogged.
First, check accessible screens and upstream pipes for blockages. If the problem continues, arrange a professional inspection to identify the cause.
Inspect the surrounding ground.d
Look for repeated pooling, erosion, settlement, dampness near foundations, or unexpected discharge from the overflow route.
These signs may indicate inadequate capacity, damaged pipes, or a failing infiltration system. Address the underlying problem rather than simply adding more fill material.
Arrange professional inspections
A qualified drainage contractor can inspect components that homeowners cannot safely access. Periodic assessments can also identify developing problems before they cause major flooding or contamination.
Never enter a drain pit, septic tank, or other confined drainage space without specialist procedures and equipment. These spaces may contain toxic gases, lack sufficient oxygen, or present engulfment hazards.
Drain Pit Installation Cost Factors
Drain pit installation costs vary significantly by location and project requirements. Therefore, obtain a site-specific quotation rather than relying on a single general price.
Several factors influence the final budget.
- Pit size and capacity: Larger systems generally require more materials and excavation.
- Soil conditions: Hard rock, unstable soil, or groundwater may increase excavation and protection costs.
- Materials: Concrete rings, masonry, gravel, and modular soakaway crates vary in cost.
- Pipework: Long drainage runs, deeper pipes, and additional inspection chambers increase labor and material requirements.
- Site access: Restricted access may require additional labor or specialized equipment.
- Professional services: Soil testing, engineering design, permits, and inspections can add to the project cost.
- Surface restoration: Replacing paving, landscaping, or driveways may represent a substantial part of the final expense.
To compare quotations fairly, ask each contractor to specify excavation, materials, pipe connections, safety measures, testing, backfilling, and restoration. Also, confirm whether the price includes any required permits or professional inspections.
FAQs
How deep should a drain pit be?
There is no single correct depth for every drain pit. The required depth depends on the system type, soil conditions, groundwater level, drainage capacity, and local requirements.
A qualified professional should establish the dimensions through testing and design rather than using a standard depth for every property.
Can I install a drain pit myself?
A small, shallow rainwater drainage feature may suit an experienced DIY installer where local rules permit it. However, deeper excavations, unstable ground, wastewater systems, and installations near foundations require appropriate professional expertise.
Always identify underground utilities and establish safe excavation procedures before digging.
Is gravel necessary for every drain pit?
No. Some soakaways use gravel or crushed stone, while others use modular storage crates or specially designed lined structures.
Follow the selected system’s specifications. Using the wrong materials can reduce capacity or interfere with infiltration.
Why does my drain pit keep overflowing?
Common causes include insufficient capacity, poor soil infiltration, blocked inlet pipes, sediment accumulation, and high groundwater.
Start by checking accessible screens and drainage pipes. If the problem persists, arrange an assessment to determine whether the pit needs cleaning, repair, redesign, or replacement.
Can a drain pit handle both rainwater and wastewater?
Do not combine these flows unless a specifically designed and legally approved system permits it. In many situations, stormwater and sanitary wastewater require separate drainage arrangements.
Keeping them separate can prevent treatment systems from becoming overloaded and reduce contamination risks.

Conclusion
Drain pit installation requires careful planning, appropriate materials, safe excavation, and a clear understanding of how water behaves on the site. A successful project starts with identifying the right type of pit and testing whether the soil can support the proposed drainage method.
Next, installers must select a suitable location, calculate the required capacity, connect the pipework correctly, and protect the system from sediment and debris. Finally, proper covers, safe access, testing, and regular maintenance help preserve performance over time.
Most importantly, remember that a rainwater soakaway is not a universal solution for every drainage problem. Wastewater disposal, foundation drainage, and stormwater management each have different requirements. By following an appropriate design and local regulations, property owners can reduce drainage problems and build a safer, more reliable system for the long term.