📑Table of Contents:
- Why Add a Roof Rack to a Model Y?
- Check Compatibility Before Installation
- Tools and Parts You Need
- Locate the Factory Mounting Points
- Apply Anti-Abrasion Tape and Install Clips
- Position and Tighten the Crossbars
- Safety Checks Before Loading Cargo
- Loading the Roof Rack Correctly
- Range, Noise, and Driving Changes
- Common Installation Mistakes
- Final Thoughts
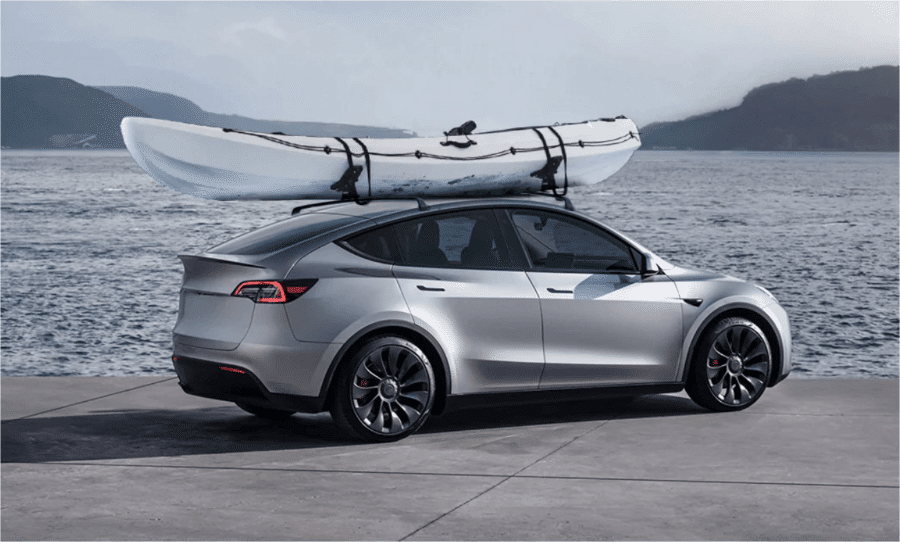
Model Y roof rack installation looks simple at first, but it deserves careful attention because the Tesla Model Y uses a glass roof and hidden mounting receivers. A properly installed rack can carry bikes, skis, snowboards, cargo boxes, and other travel gear. However, a rushed installation can create wind noise, loose crossbars, scratched glass, water issues, or even roof damage.
Because the Model Y does not have traditional exposed roof rails, Tesla’s roof rack system uses clips, pads, crossbars, protective tape, and locking covers. The attachment points sit under the glass roof trim, so alignment matters. Additionally, Tesla lists the official Model Y roof rack load rating at 165 pounds, which includes the rack and the cargo combined. Therefore, safe installation starts before you place any luggage on top.
Why Add a Roof Rack to a Model Y?
A roof rack makes the Model Y more useful for road trips, outdoor sports, and family travel. Although the Model Y already has good cargo space, bulky gear can quickly fill the cabin. A roof rack lets you move long or dirty items outside the vehicle, which helps when you carry skis, boards, bikes, kayaks, camping gear, or a cargo box.
Additionally, roof storage can make the cabin more comfortable. Passengers get more room, pets have more space, and bags do not need to pile above the rear seats. However, roof cargo affects range, wind noise, and vehicle height. As a result, drivers should install the rack correctly and remove unused accessories when they do not need them.
Check Compatibility Before Installation
Before installing any rack, confirm that it fits your specific Model Y. Tesla’s official shop states that the Model Y Roof Rack is compatible with all Model Y vehicles and uses aluminum powder-coated crossbars, die-cast towers with integrated locks, and T-slots for compatible accessories. Tesla also lists the load rating at 165 pounds. That rating matters because cargo boxes, bike carriers, ski racks, and the crossbars themselves all count toward the total load.
If you choose an aftermarket rack, check its instructions carefully. The Model Y’s glass roof and hidden receivers make fitment more sensitive than on many SUVs. Additionally, avoid parts that clamp randomly to trim or glass without using Tesla’s intended attachment points. A cheaper rack can become expensive if it causes roof or paint damage.
Tools and Parts You Need
Most Model Y roof rack kits include the main parts: front crossbar, rear crossbar, mounting pads, clips, anti-abrasion tape, fasteners, covers, and a hex wrench or torque tool. You may also need isopropyl alcohol wipes, a microfiber cloth, measuring tape, and a second person to help place the crossbars evenly.
Tesla’s official installation guidance begins by cleaning the roof rack installation locations with isopropyl alcohol and allowing the surface to dry before applying protective tape. This step matters because dirt or wax under the tape can reduce adhesion. Moreover, the tape protects the glass and trim area from abrasion where pads and clips sit.
Work in good lighting and avoid installing the rack in heavy rain, snow, or extreme heat. A clean, calm setup reduces mistakes.
Locate the Factory Mounting Points
The most important part of Model Y roof rack installation is locating the factory mounting points. Tesla’s service instructions explain that the front crossbar location uses a different measurement than the rear crossbar location. The front tape alignment starts by measuring 227 mm back from the front edge of the glass roof to locate the arrow on the glass, while the rear location starts by measuring 412 mm forward from the rear edge of the glass roof.
These details matter because the mounting clips must engage with metal receivers under the glass. If the clips sit in the wrong place, the rack may feel tight while still not being properly secured. Therefore, do not guess by eye. Use the arrows, measurements, and included alignment tools exactly as the manual describes.
Additionally, keep track of left and right parts. Tesla’s DIY guide notes that the pads use icons to help identify the correct location. The front and rear crossbars also differ, and the front crossbar is longer than the rear crossbar. Mixing these parts can cause poor fitment.
Apply Anti-Abrasion Tape and Install Clips
After cleaning the mounting areas, apply the anti-abrasion tape where the pads will sit. Align the tape arrows with the glass arrows and follow the roof trim line. Then, install the clips into the receivers beneath the glass trim.
Tesla’s DIY instructions emphasize that each clip should engage in the metal receiver under the glass. After removing the clip tool, the installer should pull up and wiggle the clip to confirm engagement. This small check is crucial. If a clip is not seated correctly, the crossbar may shift later.
Next, place the correct pad over each clip. The pads protect the vehicle and distribute contact between the roof and rack towers. Make sure they sit flat, clean, and correctly oriented before lifting the crossbars into place.
Position and Tighten the Crossbars
Before placing the crossbars, confirm that all four hooks are engaged, properly aligned, and upright. Then, carefully place the front and rear crossbars over the pads. A second person can help prevent the bar from sliding or touching the glass unexpectedly.
Install the wingnuts and hand-tighten them first. Then, use the provided hex wrench to tighten the towers. Tesla’s DIY guide recommends tightening to 2.5 to 3.5 Nm. Do not overtighten. More force does not mean more safety, especially around a glass roof. Instead, use the recommended torque range and confirm that the rack feels secure.
Once tightened, install the tower covers and lock them if your rack includes integrated locks. Finally, tug each tower gently and confirm that nothing shifts.
Safety Checks Before Loading Cargo
After installation, complete a full safety check. Look at the tape, pads, clips, towers, covers, and crossbars. Make sure the front bar is in front, the rear bar is in back, and all pads match their intended positions. Then, test for movement by pushing and pulling the crossbars gently from several directions.
Next, drive a short distance without cargo and listen for rattles, whistling, or clunking. A small amount of wind noise can happen with roof racks, but sudden rattling may indicate loose hardware or poor alignment. If anything sounds wrong, stop and inspect the setup before loading gear.
Additionally, recheck the rack after your first trip and periodically afterward. Temperature changes, vibration, and heavy cargo can reveal small installation issues.
Loading the Roof Rack Correctly
Tesla lists the Model Y roof rack load rating at 165 pounds. That number should include the weight of the rack, mounting accessories, cargo box, bike carriers, and cargo. Therefore, if a cargo box weighs 40 pounds, you must subtract that from the total before adding luggage.
Distribute weight evenly across the crossbars. Place heavier items toward the center and avoid side-heavy loads. Additionally, secure all cargo with straps or manufacturer-approved mounts. Loose roof cargo can create serious road hazards.
Also, check accessory limits. A bike rack, ski carrier, kayak mount, or cargo box may have its own lower rating. Use the lowest applicable limit, not the highest one. Moreover, remember that rooftop cargo increases total vehicle height. This matters in garages, drive-throughs, ferries, parking structures, and low branches.
Range, Noise, and Driving Changes
A roof rack affects aerodynamics. Even empty crossbars can add some wind noise and reduce range, while cargo boxes, bikes, and kayaks create more drag. Therefore, drivers should expect higher energy use during highway trips.
Additionally, roof cargo changes handling. A heavier load raises the center of gravity and can make the vehicle feel different in crosswinds, sudden turns, or emergency maneuvers. Drive more smoothly, leave more following distance, and avoid aggressive cornering. Although the Model Y has strong electric acceleration, roof cargo is not the time to test it.
If you only need the rack occasionally, remove it between trips. This can reduce noise, improve efficiency, and protect the rack from weather and wear.
Common Installation Mistakes
The most common mistake is misaligning the clips. If the hook does not engage the receiver under the glass, the rack may look installed but lack proper security. Another mistake is placing the front and rear crossbars in the wrong positions. Since the front crossbar is longer, mixing them can create a poor fit.
Other mistakes include skipping the cleaning step, applying protective tape crookedly, overtightening the towers, loading above the 165-pound limit, or ignoring strange noises after installation. Additionally, some owners forget to count the cargo box or accessory weight toward the total load.
Therefore, the safest approach is slow and methodical. Follow the manual, verify every clip, and do not treat the glass roof like a traditional metal rail.

Final Thoughts
Model Y roof rack installation can be a practical DIY project if you follow Tesla’s instructions carefully. The key steps include cleaning the roof, locating the factory mounting arrows, applying anti-abrasion tape, engaging the clips in the hidden receivers, placing the correct pads, positioning the front and rear crossbars correctly, and tightening the hardware to the recommended range.
Ultimately, the goal is not just to mount crossbars. The goal is to carry gear safely without damaging the glass roof or reducing vehicle security. Respect the 165-pound load rating, include the weight of accessories, test the rack before loading cargo, and recheck it after the first drive. When installed correctly, a Model Y roof rack can make your Tesla more versatile for road trips, sports gear, camping, and everyday cargo needs.